WordPress provides its own default menu which works well in most cases, but then there are times when you want a little bit more and need to use a WordPress Custom Menu. You may want to arrange menu items in a certain order and hierarchy; include pages, posts and external links(custom links) in the menu and make sure that it is useful and appeals to the end user when creating your own theme. The tutorial below explains the steps for creating a custom menu in WordPress.
The first step is to enable support for this feature by registering it in the theme’s functions.php file.
Register WordPress Menus
In your theme’s functions.php file, you need to write a function to register the names of your menus. You can include multiple custom menus e.g. in the header, footer, sidebar etc. (This is how they will appear in the Appearance -> Menus admin screen.)
As an example (See the below code), this menu would appear in the “Theme Locations” box as “Header Menu”. You are registering a single custom menu here.
function register_my_menu() {
  register_nav_menu('header-menu',__( 'Header Menu' ));
}
add_action( 'init', 'register_my_menu' );
You will need to use the array function to include multiple custom menus. This would make two menu options appear, header menu and extra menu. Similarly you can register as many menus as you want.
function register_my_menus() {
  register_nav_menus(
    array(
      'header-menu' => __( 'Header Menu' ),
      'extra-menu' => __( 'Extra Menu' )
    )
  );
}
add_action( 'init', 'register_my_menus' );
Display Menus on Theme
Once you’ve done that, you are almost ready to use it in your theme now. The next step is to tell the theme where you want the menu to appear. The changes need to be done in relevant theme file where you want the menu. So, in all probability, we would want our header menu to appear in the theme header, therefore we need to edit the header.php file. So open up the file in your preferred theme editor, and find the place where you wan the menu to be inserted.
We will use the wp_nav_menu once for each menu location. So, add the header example we will use the folllowing code –
<?php wp_nav_menu( array( 'theme_location' => 'header-menu' ) ); ?>
Make sure that the theme_location name is same as you provided in the functions.php code above, at the time of registering the custom menu.
It is important to note that it is the header-menu being used here rather than “Header Menu” without a hyphen. The “header-menu” is the name that the code understands, and “Header Menu” is the human-readable version that you see in the admin page.
Now to complete our example, we can put the “Extra Menu” which was also registered along with the “Header Menu” someplace else. Maybe you want a menu on one of your pages, for example, and at the same time want to jazz it up a little with a containing DIV of a certain class –
<?php wp_nav_menu( array( 'theme_location' => 'extra-menu', 'container_class' => 'my_extra_menu_class' ) ); ?>
So go ahead and put the above into your Page template, and not only would the menu show up wherever you put it, it would be styled as my_extra_menu_class. So that you can directly control the stying through your CSS file.
All the background work done now.
Create a Custom Menu
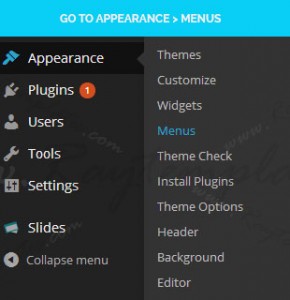
Now, visit the Appearance > Menus panel in your site Admin Dashboard.
To create a new custom menu, click the “create a new menu” link, give the menu a name, and click Save Menu button.
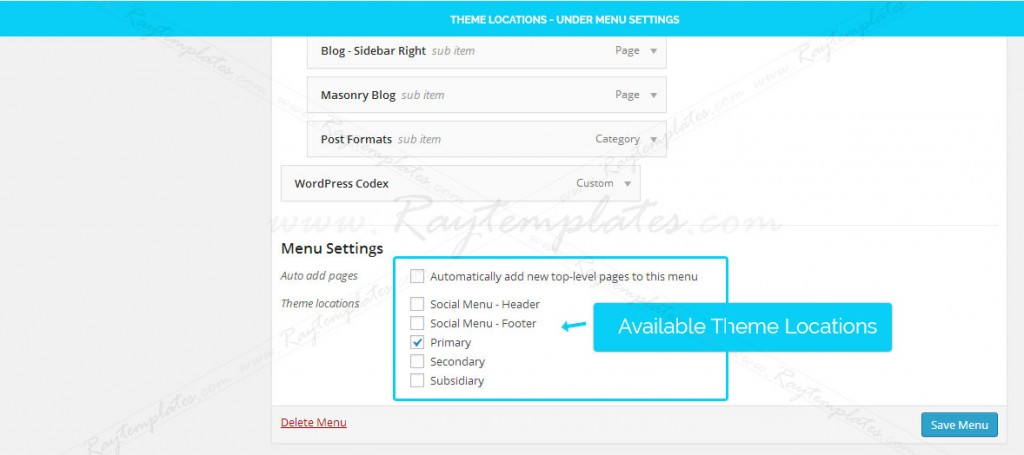
You will find the following options once your menu has been created:
1. Automatically add new top-level pages:-
Check this box so that anytime a new top-level Page is created, that Page will automatically be added to the menu.
2. Theme Locations:-
If more than one menu is supported, you can select where this menu should go.
3. Delete Menu:-
Click this link to delete the menu. Deleting also deletes the menu items.
Save menu – Click this button to save the menu.
Add Menu Items
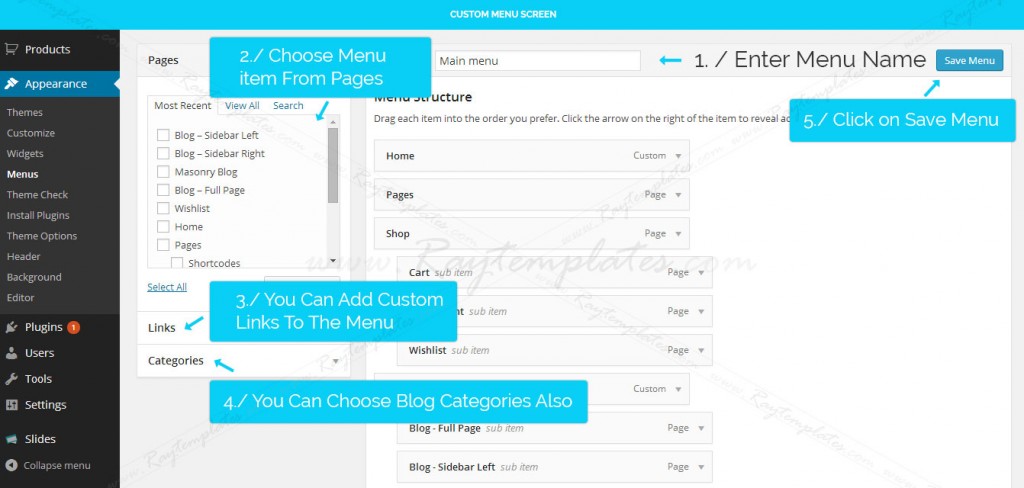
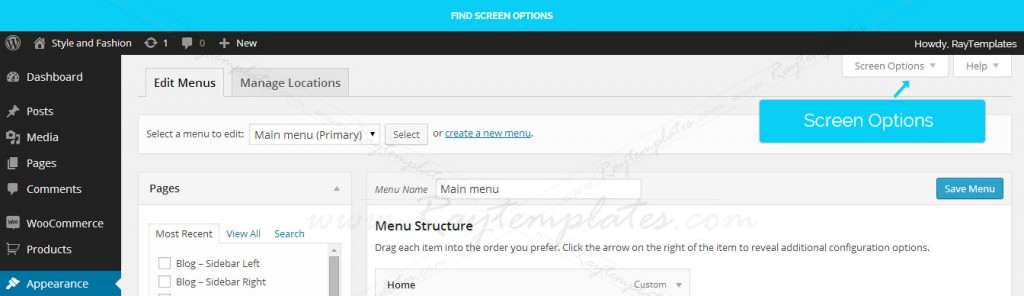
After a menu is created, then menu items can be added to the menu. Choose from items like custom links, pages, and categories, from the left column to add to the menu. If you have created a custom post types or custom taxonomies those too can be added to menus. If you don’t see your custom post types or taxonomies, look under the “Screen Options” (You can find it on the top of the screen) to make sure they are checked to be Shown on Screen.
After items have been added to the menu, you can drag and drop to put arrange them in the order you want.
You can also drag a menu item a little to the right to make it a submenu of its parent item; this allows you to arrange menus in hierarcy.
You’ll see when the position of the drop target shifts over to portray the nested placement. When you have finished building your custom menu, make sure you click the Save Menu button.
You can create multiple menus. If your theme includes more than one menu, you can choose which custom menu to associate with each.
Done 🙂
Have questions? Let us know in the comments below.